Now we want to build the missing groups, boiler and driver’s cabin.
This is very simple and works the same way as with the chassis:
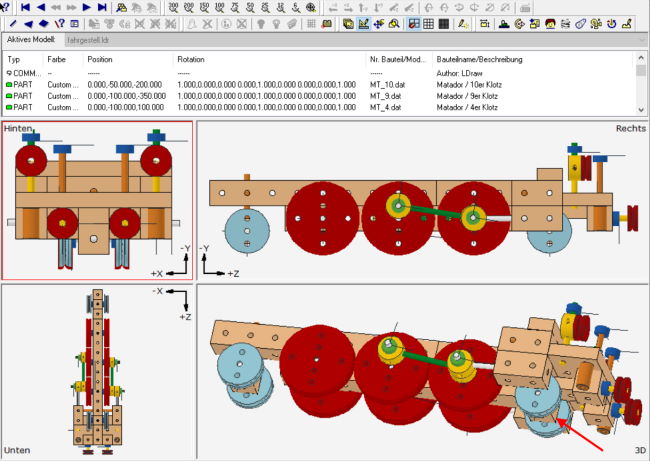
Create assemblies for the two areas, switch MLCad to ‘rough’ mode and create each group separately.
Now we create a new object file, the ‘parent file’ so to speak, named 1223.ldr. In this we load three assemblies:
- Chassis
- Driver’s cabin
- Boiler
This completes the locomotive. In MLCad we see this before moving to the correct positions:
What we are still missing are the rails. Since we want to animate the locomotive, it can be assumed that we will have to create more than one track length in order to be able to later run the steam locomotive correctly.
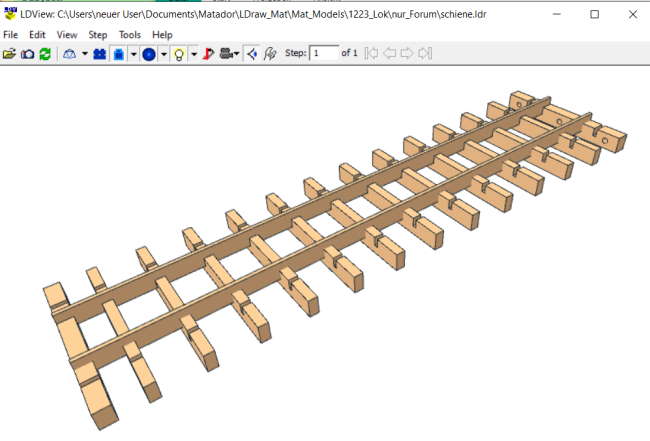
We’re doing this – not surprisingly – again with groups. A complete rail length is created (file ‘rail.ldr’). Then loaded twice into a new file ‘rails.ldr’.
We use Matador parts MT200 (rail), as well as MT213 (end sleeper) and MT218 (sleeper without holes).
Note: In the 1930s there were special sleepers for the 35mm gauge. However, I have not yet digitally created this type as a Matador component.
I therefore use the well-known types of rails and sleepers from later years.
To make them look more realistic, and since more components don’t cost more here :-), I use 12 sleepers plus the two end sleepers per rail length (39 cm). Here is a representation, this time in a screenshot in LDView:
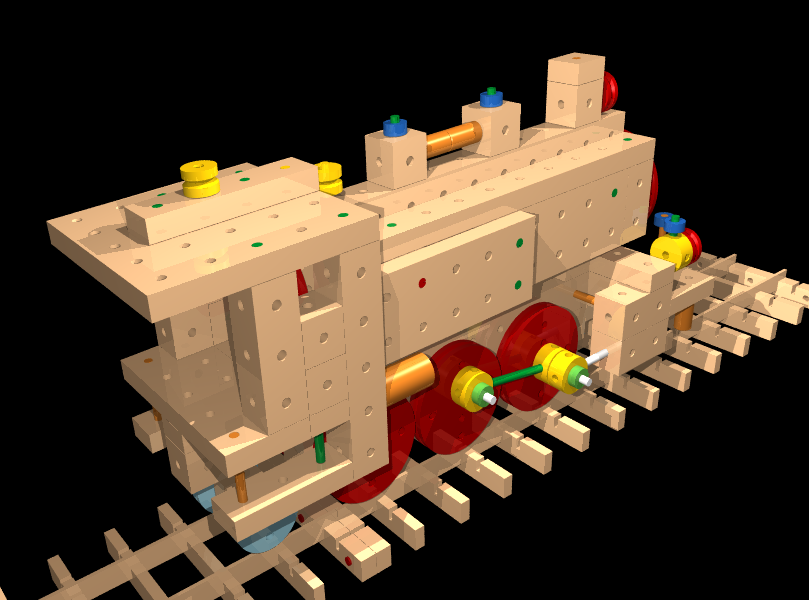
We load the ‘rail.ldr’ assembly twice into 1223.ldr and move it to the correct position. Complete!
If we do an L3p export and render with POV-Ray, we get a images like these (camera position was optimized with LDView):

Download Projekt
One reply on “Steam Engine 1223 (Part II)”
Thanks for your blog, nice to read. Do not stop.